(All code accompanying this tutorial series can be found here)
They say that good things come to those who wait, and well… there’s been a bit of a wait for this one. Life has kept me away from article writing for quite a while, but as the year draws to a close, what better time is there to finish out our Rust game programming series!
So to recap, first we set up Macroquad, then we got the bat, ball and bricks working, and finally we got the collision detection and destruction of bricks up and running. That’s pretty much all the main mechanics up and running, but that’s still not a game. We want to put in place the bits that will take it from a demo to a fully fledged game, finishing up the promise that we started out with!
Keeping Score
Running lesson 3 gives us something that resembles Breakout – we have the ball bouncing around, hitting bricks and destroying them but when the ball hits the bottom, it just bounces off.
Now while immortality is great for our ball, the point of a game is being able to win in a scenario where you can die (indeed, that’s pretty much all of life!) so we need to implement this behavior in our game, along with gamestates to round it out and turn it into a proper game and not just a collision detection demo.
How do we do this? Well, to start with, let’s add support for scoring and lives to what we had at the end of lesson 3.
In ball.rs we should remove the code that makes the ball bounce off the bottom of the screen on lines 31-33:
if self.rect.y < 0f32 {
            self.vel.y = 1f32;
}
// delete this!
if self.rect.y > screen_height() - self.rect.h {
        self.vel.y = -1f32;
}
So now the ball goes flying off the bottom of the screen!
Next, in main.rs we’ll need to add lives and scoring under the main function:
async fn main() {
    // add these two!
    let mut score = 0;
    let mut player_lives = 3;

    let mut player = Player::new();
    let mut blocks = Vec::new();
    let mut balls = Vec::new();
To get the scoring working, we need to make it so that every hit of the bricks earns 10 points. We can do this by going to lines 66-69 and making the following additions to the code:
for ball in balls.iter_mut() {
      resolve_collision(&mut ball.rect, &mut ball.vel, &player.rect);
     for block in blocks.iter_mut() {
         if resolve_collision(&mut ball.rect, &mut ball.vel, &block.rect) {
              block.lives -= 1;
              // if the block runs out of lives and is destroyed, up
              // the score by 10 points
              if block.lives <= 0 {
                      score += 10;
                    }
              }
           }
        }
And to keep track of all this, we should add some functions to print the score and lives to the screen on line 80 after the ball drawing code:
for ball in balls.iter() {
            ball.draw();
}
// draw score and player lives to the screen
let score_text = format!("Score: {}", score);
draw_text_ex(
     &score_text,
     40.0,
     40.0,
     TextParams {
        font_size: 30u16,
        color: BLACK,
        ..Default::default()
      },
    );

let player_lives_text = format!("Lives: {}", player_lives);
draw_text_ex(
    &player_lives_text,
    screen_width() / 2.0,
    40.0,
    TextParams {
        font_size: 30u16,
        color: BLACK,
        ..Default::default()
      },
    );
After having done all this, building and running should yield the following:
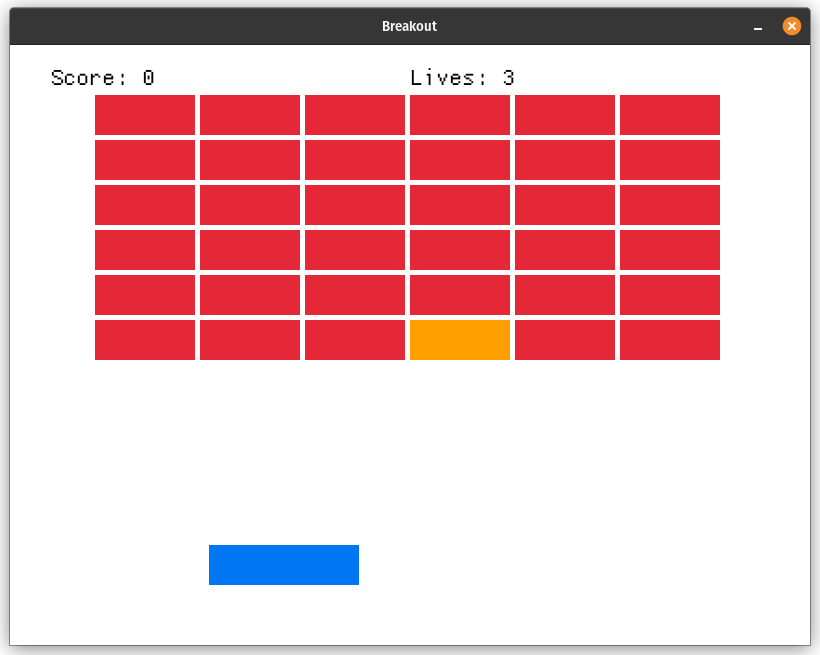
As you can see, we have nearly all the elements that we need, but the ball has flown off the bottom of the screen, never to come back. There’s still something missing…
State of The Game!
What we need is to introduce a GameState to our game loop. A gamestate keeps track of what’s happening – if the game is playing, if it’s in a menu, or if you’ve won.
To start, we need to introduce a GameState variable at the top of main.rs:
pub enum GameState {
    Menu,
    Game,
    LevelCompleted,
    Dead,
}
These four enums represent the state the game can be in:
- Menu – the start screen
- Game – when active gameplay is going on
- LevelCompleted – when all blocks have been destroyed
- Dead – when you’ve run out of lives
We’ve now got the four states we need, ready to be implemented, but we need a few more functions: to draw text for the menus, and to set up the blocks and reset the game as well as using the BALL_SIZE constant:
use ball::{Ball, BALL_SIZE};

...

pub fn draw_title_text(text: &str) {
    draw_text_ex(
        text,
        40.0,
        40.0,
        TextParams {
            font_size: 30u16,
            color: BLACK,
            ..Default::default()
        },
    );
}


fn init_blocks(blocks: &mut Vec<Block>) {
    let (width, height) = (6, 6);
    let padding = 5f32;
    let total_block_size = BLOCK_SIZE + vec2(padding, padding);
    let board_start_pos = vec2((screen_width() - (total_block_size.x * width as f32)) * 0.5f32, 50f32);

    for i in 0..width * height {
        let block_x = (i % width) as f32 * total_block_size.x;
        let block_y = (i / width) as f32 * total_block_size.y;
        blocks.push(Block::new(board_start_pos + vec2(block_x, block_y)));
    }
}

fn reset_game(
    score: &mut i32,
    player_lives: &mut i32,
    blocks: &mut Vec<Block>,
    balls: &mut Vec<Ball>,
    player: &mut Player,
) {
    *player = Player::new();
    *score = 0;
    *player_lives = 3;
    balls.clear();
    balls.push(Ball::new(vec2(
        screen_width() * 0.5f32 - BALL_SIZE * 0.5f32,
        screen_height() * 0.5f32,
    )));
    blocks.clear();
    init_blocks(blocks);
}
These three functions will be very important for setting up the game states: init_blocks and reset_game allow us to clear the board after the player has died or won. We’re going to need these for the next stage: sorting out the gamestates.
This involves some rewriting of the game loop:
loop {
  match game_state {
            GameState::Menu => {
            }
            GameState::Game => {
            }
            GameState::Dead | GameState::LevelCompleted => {
            }
        }
This match statement allows us to rewrite the game to handle several different states.
Firstly, the menu state that’s presented at the start:
 GameState::Menu => {
    if is_key_pressed(KeyCode::Space) {
           game_state = GameState::Game;
         }
   }
This is the opening state of the game, and rather than being launched straight into it, you get a start screen… which is a nice opportunity for a breather before smashing blocks! When you press start, you get sent to the main game state.
GameState::Game => {
                player.update(get_frame_time());
                for ball in balls.iter_mut() {
                    ball.update(get_frame_time());
                }

                for ball in balls.iter_mut() {
                    resolve_collision(&mut ball.rect, &mut ball.vel, &player.rect);
                    for block in blocks.iter_mut() {
                        if resolve_collision(&mut ball.rect, &mut ball.vel, &block.rect) {
                            block.lives -= 1;
                            if block.lives <= 0 {
                                score += 10;
                            }
                        }
                    }
                }

                let balls_len = balls.len();
                let was_last_ball = balls_len == 1;
                balls.retain(|ball| ball.rect.y < screen_height());
                let removed_balls = balls_len - balls.len();
                if removed_balls > 0 && was_last_ball {
                        player_lives -= 1;
                        balls.push(Ball::new(
                            player.rect.point()
                            + vec2(player.rect.w * 0.5f32 - BALL_SIZE * 0.5f32, -50f32)
                        ));
                        if player_lives <= 0 {
                            game_state = GameState::Dead;
                        }
                    }

                blocks.retain(|block| block.lives > 0);
                if blocks.is_empty() {
                    game_state = GameState::LevelCompleted;
                }
            }
This is the game logic we’ve had before, wrapped up in the active Game state. The most important bit of it is this:
let removed_balls = balls_len - balls.len();
                if removed_balls > 0 && was_last_ball {
                        player_lives -= 1;
                        balls.push(Ball::new(
                            player.rect.point()
                            + vec2(player.rect.w * 0.5f32 - BALL_SIZE * 0.5f32, -50f32)
                        ));
                        if player_lives <= 0 {
                            game_state = GameState::Dead;
                        }
                    }

                blocks.retain(|block| block.lives > 0);
                if blocks.is_empty() {
                    game_state = GameState::LevelCompleted;
                }
where we’ve put in an if-statement telling the game that if the player is out of lives, then we need to go to the Dead state, or the player has destroyed all blocks then go to the LevelCompleted state. If the player has one or more lives, then a new ball spawns and the game continues.
We handle the last two states together in our game loop:
GameState::Dead | GameState::LevelCompleted => {
                if is_key_pressed(KeyCode::Space) {
                    game_state = GameState::Menu;
                    reset_game(
                        &mut score,
                        &mut player_lives,
                        &mut blocks,
                        &mut balls,
                        &mut player
                    );
                }
            }
Essentially, they’re both very similar: dying, or having the level completed sends you back to the menu screen, and resets the game!
We now need to take care of the menu states, and we do that by having another match statement a bit further down after the ball drawing code:
match game_state {
            GameState::Menu => {
                draw_title_text("Press SPACE to Start");
            },
            GameState::Game => {
                let score_text = format!("Score: {}", score);
                draw_text_ex(
                    &score_text,
                    40.0,
                    40.0,
                    TextParams {
                        font_size: 30u16,
                        color: BLACK,
                        ..Default::default()
                    },
                );

                let player_lives_text = format!("Lives: {}", player_lives);
                draw_text_ex(
                    &player_lives_text,
                    screen_width() / 2.0,
                    40.0,
                    TextParams {
                        font_size: 30u16,
                        color: BLACK,
                        ..Default::default()
                    },
                );
            },
            GameState::LevelCompleted => {
                draw_title_text(&format!("You win! Score: {}", score));
            },
            GameState::Dead => {
                draw_title_text(&format!("You died! Score: {}", score));
            },
        }
This match statement just takes care of the text needed in each circumstance, using the draw_title_text function we introduced earlier to give instructions on how to start the game, keeping track of the score and player lives while the game is playing, and then at the end either telling the player they died, or they won.
That’s pretty much all we need to run our game! Build and run it and we see:
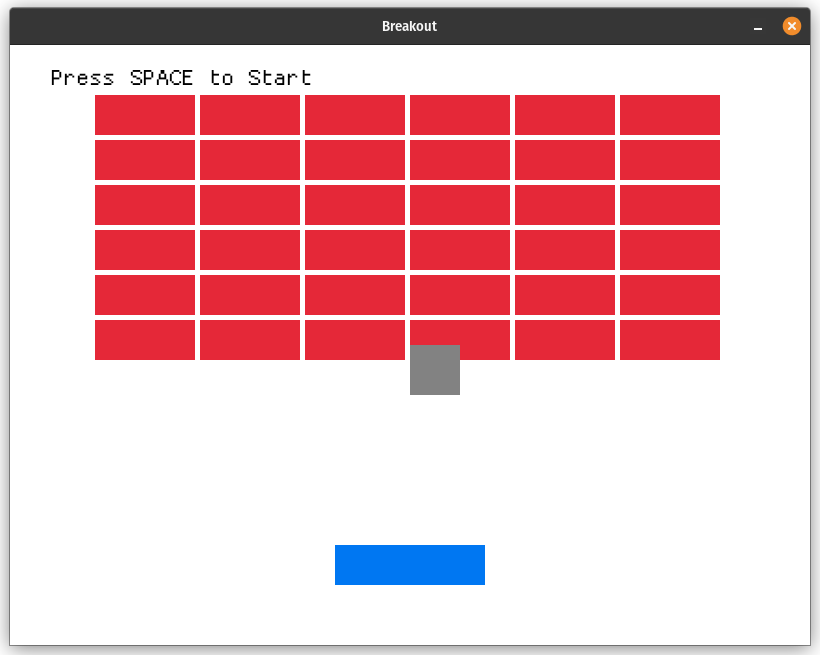
The game is now functionally complete – pressing space will start the game, and it’ll keep going until we die, or destroy all of the blocks! But I don’t know… I think we can improve things a bit…
I Have The Power(ups)!
In old-fashioned games (which Breakout certainly is) one thing that always was fun was powerups, those modifiers that made things a little more challenging and exciting, and while we don’t have many ways to go in a simple game like Breakout we can still at least get one powerup in our game: more balls!
This makes the game more challenging, but also allows us to clear the field quicker. So how do we do this?
Let’s go to block.rs and make a few changes, first introducing a new BlockType enum:
#[derive(PartialEq)]
pub enum BlockType {
    Regular,
    SpawnBallOnDeath,
}
So now we have Regular bricks, and another type called SpawnBallOnDeath which… spawns another ball on death. Never let it be said that we don’t name our variables in a self-explanatory fashion!
Next, let’s change the Block struct to have the BlockType included in it:
pub struct Block {
    pub rect: Rect,
    pub lives: i32,
    pub block_type: BlockType,
}
After we’ve done this, it’s time to change the implementation of the Block struct to use our new BlockType:
impl Block {
    pub fn new(pos: Vec2, block_type: BlockType) -> Self {
        Self {
            rect: Rect::new(pos.x, pos.y, BLOCK_SIZE.x, BLOCK_SIZE.y),
            lives: 2,
            block_type
        }
    }

    pub fn draw(&self) {
        let color = match self.block_type {
            BlockType::Regular => match self.lives {
                2 => RED,
                _ => ORANGE
            },
            BlockType::SpawnBallOnDeath => GREEN,
        };
        draw_rectangle(self.rect.x, self.rect.y, self.rect.w, self.rect.h, color);
    }
}
We’ve made a change here to the constructor:
pub fn new(pos: Vec2, block_type: BlockType) -> Self {
        Self {
            rect: Rect::new(pos.x, pos.y, BLOCK_SIZE.x, BLOCK_SIZE.y),
            lives: 2,
            block_type
        }
    }
to take in the block type, and in the draw function we’re going to draw the new block type as green!
pub fn draw(&self) {
        let color = match self.block_type {
            BlockType::Regular => match self.lives {
                2 => RED,
                _ => ORANGE
            },
            BlockType::SpawnBallOnDeath => GREEN,
        };
        draw_rectangle(self.rect.x, self.rect.y, self.rect.w, self.rect.h, color);
    }
So, we’ve got our green brick set up – now we need to make changes to main.rs to get it in!
Firstly, we’ll bring in a vector at the top to store our extra balls, then bring our new blocktype in:
use std::vec;

...

use block::{Block, BlockType, BLOCK_SIZE};
This introduces the changes we made in block.rs, which allow us to make some further modifications to init_blocks to support the new block type:
fn init_blocks(blocks: &mut Vec<Block>) {
    let (width, height) = (6, 6);
    let padding = 5f32;
    let total_block_size = BLOCK_SIZE + vec2(padding, padding);
    let board_start_pos = vec2((screen_width() - (total_block_size.x * width as f32)) * 0.5f32, 50f32);

    for i in 0..width * height {
        let block_x = (i % width) as f32 * total_block_size.x;
        let block_y = (i / width) as f32 * total_block_size.y;
        blocks.push(Block::new(board_start_pos + vec2(block_x, block_y),
        BlockType::Regular,
        ));
    }
    // add the green blocks¬
    for _ in 0..3 {
        let rand_index = rand::gen_range(0, blocks.len());
        blocks[rand_index].block_type = BlockType::SpawnBallOnDeath;
    }
}
We randomly put in a few blocks of the new SpawnBallOnDeath type to make things more interesting, and then in the Game state, we make the following enhancements:
// add a vector to store our balls
let mut spawn_later = vec![];
for ball in balls.iter_mut() {
    resolve_collision(&mut ball.rect, &mut ball.vel, &player.rect);
    for block in blocks.iter_mut() {
          if resolve_collision(&mut ball.rect, &mut ball.vel, &block.rect) {
                            block.lives -= 1;
                            if block.lives <= 0 {
                                score += 10;
       // if we destroy a SpawnBallOnDeath block,add it to
       // spawn_later
       if block.block_type == BlockType::SpawnBallOnDeath {                                            spawn_later.push(Ball::new(ball.rect.point()));
                                }
                            }
                        }
                    }
                }

    for ball in spawn_later.into_iter() {
                    balls.push(ball);
    }
So now when we destroy a SpawnBallOnDeath block, it adds another ball for us to use! And it looks something like this:

As we see now, we have two balls in motion, along with one of our green brick power ups! It took a little while, but we’ve now completed a simple but complete game in Macroquad!
Journey’s End
So we’ve gone from having a simple Macroquad window to a fully-fledged game, complete with game states and multiple ball powerups. Although the game is simple, if we’d tried to do it from first principles using, say, OpenGL for rendering we would have taken a much longer time to get here.
While that might have been another interesting journey, with Macroquad we were able to get up and running very quickly, and produce something fun using Rust but without getting sucked into the weeds of verbose low-level programming. It’s also a great working example that could be extended on in the future, and who knows… we might come back to do some more stuff with Macroquad!
This was a fun exercise, and we’ve been able to show that making a first game needn’t be too difficult or involve a lot of reading about maths (although that is fun too!). Using the powerful, easy-to-use gamedev libraries we have now like Macroquad, it’s never been easier to get into game programming if you want to.
