So a while ago I wrote a post called pizza pizza about how I was learning to make pizza, showing off my progress from how I learned to make pizza from scratch as I was getting sick of takeaway pizza and how much it was costing me (and oh, at £14 a shout plus the delivery fees, it was pricey!). And unlike last time, which was mostly just me boasting about how far I’ve come, I’m bringing home the goods and sharing what I’ve learned.
I was proud of how I’d turned out in only a few months, and when I started in 2021 finally learning to make my own competent pizza was something I was super proud of. I mean, when you start with amorphous pizza like blobs like this:
And moving on from that abomination, it has to be good. Two years later, here’s where I am!

Much improved, as I’m sure you’ll all agree. I went through a pretentious artisan stage involving sourdough and days-long proofs, but now I’ve figured out a dough that will satisfy your pizza urges on a Friday night, and can be whipped up in about an hour. Considering how long Deliveroo takes these days (and they’ve started charging you for “priority delivery” now), I’m saving you around £14 or more, I’d figure.
For the best results, you need a pizza steel, like mine (which is covered in semolina from last night):

This is a large, around 12 inch by 12 inch, 6mm thick lump of steel that you stick in your oven and heat for an hour. It stores heat incredibly effectively, and gives you the wide, hot surface you need to get an authentic, crispy crust. A pizza stone will do well here, too.
You can cook it with a baking tray, but you might get a bit more of a doughy, wet crust. You need the surface the pizza is cooked on to expose it to a lot of heat to get the best results! Googling “pizza steel” will find you a pizza steel for around £45/$60 and up. Sounds expensive, but given that delivery pizza is around £14 that’s around 3 week’s deliveries. After that it pays for itself.
Dough
So, onto the dough! Here’s how I made the pizza you saw above. This will make a 12-inch pizza for one. I’ll include baker’s percentages to scale up.
150g very strong white bread flour (around 14g protein)
100g of coca cola
4-5g of yeast (sounds like a lot, but this is same day dough so I want it to rise quickly!)
5g of salt
3g extra virgin olive oil.
In bakers’ percentages:
100% very strong white bread flour
66.67% coca cola
2.67% yeast
3.33% salt
2% extra virgin olive oil.
Let’s tackle two things here: very strong white bread flour to start!
If you want that New York slice feel, the strongest bread flour is important. Tesco do a Tesco Finest Very Strong White Bread Flour with 13.6g of protein, and this is brilliant for this. The gluten forms quickly with kneading, and when shaping it it will give you a base that will easily flatten out and not rip. It can also hold a fair amount of toppings too and not collapse, which is important.
Second: Coca Cola? Yeah, Coca Cola. Remember that weird middle school science class where the teacher got a bottle of coke and put yeast in the bottle to inflate a balloon? Well it works for yeast too!
Or Pepsi, or any full-fat soft drink really. I just chose Coca Cola as it’s what I had lying around. Given that a 330ml can of coke contains 14g of sugar, in 100g of cola you have around 4.5g of sugar, which is perfect food for the yeast. Don’t worry about weird tasting pizza, the flavourings and other stuff get drowned out by the yeast.
Mix it all together in a large bowl, and then start kneading it with your hands. The dough’s hydration is around 66%, and that should be fine. If it gets a bit sticky, just put in a small handful of flour to take care of it but don’t overdo! You want it to be easy to work with. I knead for about 10 minutes or so, then leave it for 10 minutes just to rest.
Make the dough into a ball by folding your dough over in your hands, then rolling it around on your work surface. It should form into a ball, then fill a container, something like this:

with some olive oil, then put your dough ball in it. Try rolling it around as well, to get it all covered so the crust will brown nicely. Leave it for one hour!
In the meantime, turn your oven with the steel on as high as it will go (mine is 250 degrees celsius/480 degrees fahrenheit) and leave it heat up for an hour. You want it piping hot when it’s pizza time!
Sauce and Cheese
Next, sauce. My sauce ingredients are tomato passata, some oregano, and a pinch of salt. That’s it, not cooked, and some people say to put olive oil in your sauce – don’t. It makes it taste weird. I have to admit it’s not the most extravagant, but it works.
Cheese? I use a mixture of Parmesan Reggiano (Tesco creamfields Grana Padano will do if you’re on a budget) sprinkled first, then a mixture of Tesco Pizza Mozzarella which I shred myself with some mature cheddar mixed in. I find the mozzarella quite bland on its own, so I add some mature cheese to give it some bite.
Don’t use pre-shredded bagged mozerella for the love of God. It’s fucking awful. Yes, I’m serious. That stuff has potato starch on it. and will burn easily. It’s a rookie mistake many make, but if you use this you’re going to get shitty pizza. The Tesco pizza mozzerella block is easily shreddable, and if you take it straight out of the fridge it will be easy to shred. Pre-shredded mozzarella sucks, I cannot emphasize this enough.
Preparing and cooking your pizza
So your oven has heated up over an hour, and your dough has risen, it’s time to make the pizza! You need something like a clean chopping board or clean kitchen surface to work on, which I put a handful of flour onto so the dough doesn’t stick to it.
You also need a peel (this is mine):

or failing that, a baking tray or even a sheet of cardboard. A large, flat surface you can slide your pizza off of. Put a handful of flour (or even better, semolina flour) onto your peel. I would recommend wood over metal, as metal sticks easier to dough and makes it harder to slide.
Plop the dough out onto your chopping board, and start patting it out. It should be in a sort of hockey-puck shape, so around the rim pat out a sort of “moat” to form a crust, then pat down the center to force the gas that’s in the risen dough out to the edges of the pizza.
Once this is done, pick up the dough by its edge and rotate it, doing a sort of “steering wheel” style motion. This is my preferred method, as it doesn’t have the pizza flying all over the place. I can actually toss dough, but flour spills everywhere and I don’t like it. The dough you made earlier should be strong enough to stretch and not rip if all went right.
In fact, I’ll just put a great video about stretching pizza dough here. It’s all good advice.
So once you’ve stretched it out, put it on your floured peel/cardboard/whatever and now it’s time to make your pizza!
First, get a spoon, take a spoonful of sauce and drop it on your pizza, then use the bottom of the spoon to spread it out. My advice would be to be more sparing, and spread it widely but thinly. Dousing your pizza in sauce will just give you a soupy mess that will dissolve. I’ve done that before! Spread your sauce up to your crust, then stop there.
Next, sprinkle on the Parmesan. Dust all over the pizza with this, as it will give the cheese mixture a bit of bite. Then, spread on your mix of shredded mozzarella and cheddar cheese, and again I’d say go sparingly. “Loads of cheese!” sounds good, but too much and the fat from the cheese will form a disgusting goopy layer which can ruin your day.
If I were to quantify it, I would say enough cheese so it covers the sauce, but the sauce is still visible through the gaps. You’ll know it when you see it.
Then it’s oven time! Give your pizza a shimmy on the peel, if it slides around you’re good. If not, see where it sticks, lift the pizza up and toss some flour under the sticky spot, and try again. It should work! Slide the pizza onto your steel, and set a timer for about 6-7 minutes.
From my experience, this is how long it takes for the crust to brown and firm up. I also like to watch it as the crust puffs up, and the cheese melts and starts to bubble up too. It’s fascinating!
Once the timer goes off, turn the oven off and then get the pizza off the steel with the peel, and get a cooking rack and put it on top of that to cool. If you put a hot pizza on a cold surface, you’ll get some moisture forming and a ruined, soggy crust, so make sure you have a cooling rack!
It’s pizza time!
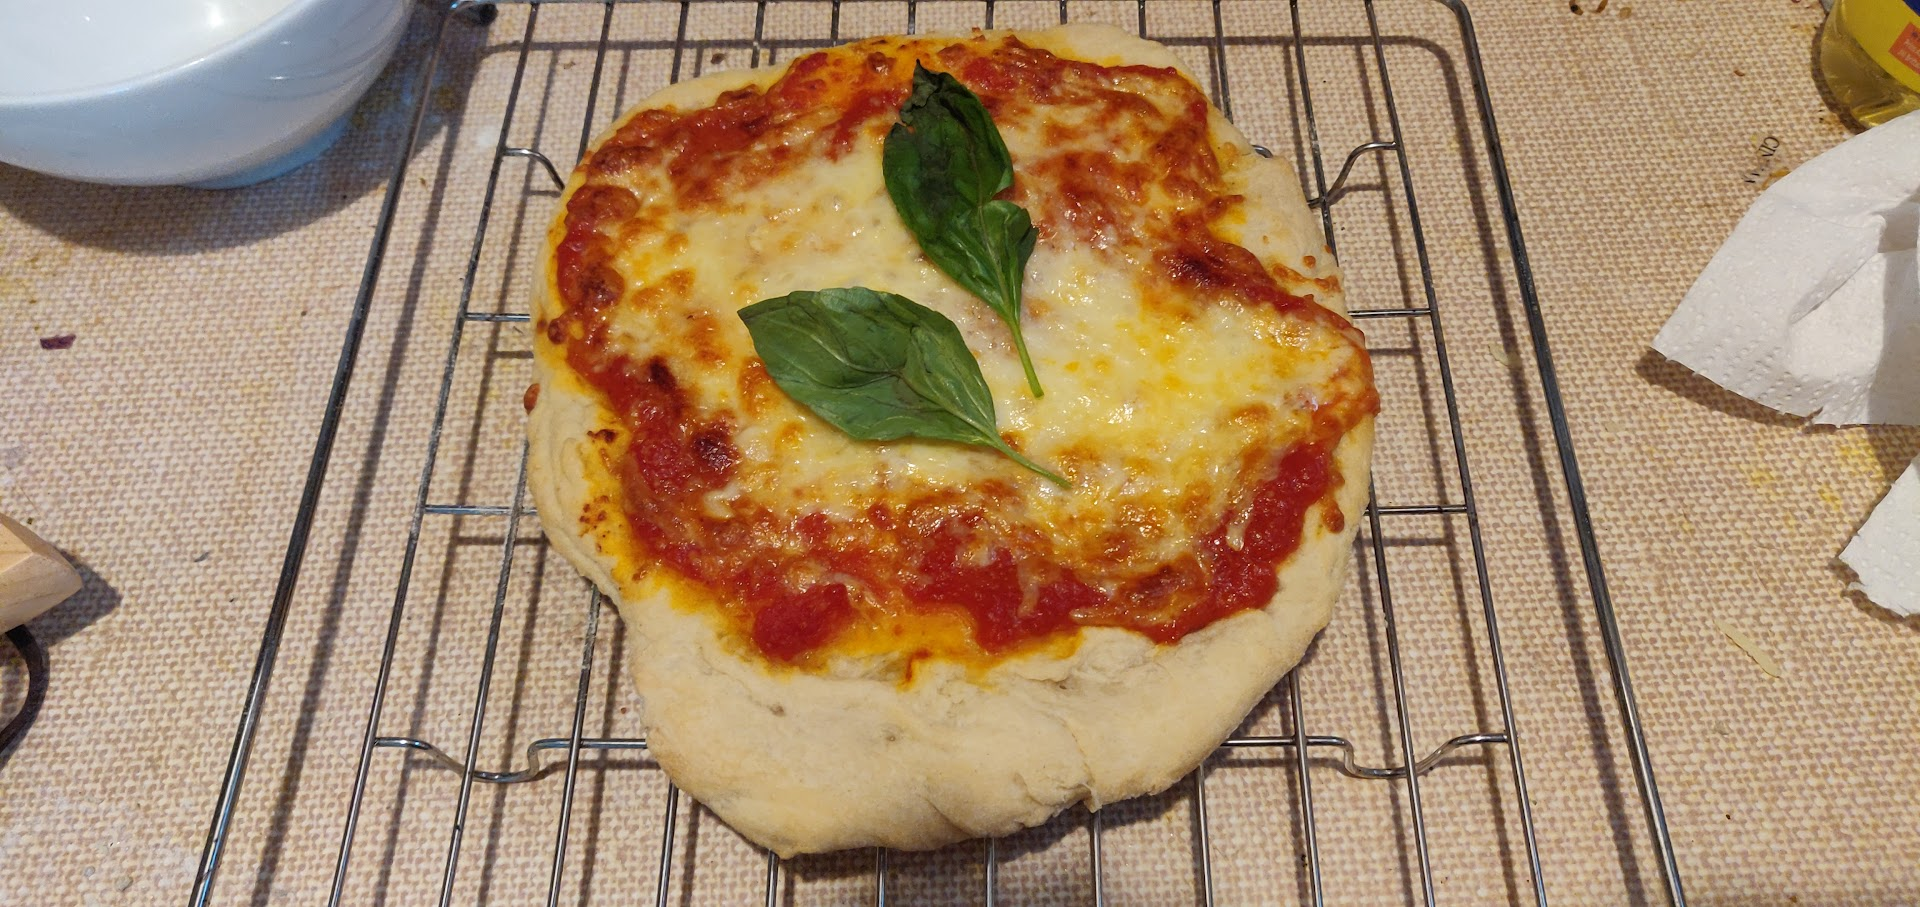
If all has gone well, you should have something that looks like this:

Sliced up, it should look like this:

and on a plate with some oregano sprinkled on it, should look like this:

And after this, it should be gone, eaten.
OK… maybe I am showing off here, but a) I love my pizzas and b) I like looking at photos of them. It reminds me that I started out making amorphous blobs, and now I can make pizza that is, dare I say it, better than some of the shittier takeaways I’ve had in my life.
Like if I was delivered this pizza from a shop, I’d probably make a note of that shop as it would make some of the better pizza in my town. I’m very proud I’ve gotten to this point, and hopefully with the advice I’ve given in this blog, you can get here too!
If you want some help, or just to chat about pizza, drop a comment or I can be reached on Twitter (is it X now?) on @theanswers42com, or on BlueSky at @theanswers42.bsky.social. That’s usually where I’m hanging out, nowadays.
Bon appetit!
