I’ve been doing my development work in Linux for a while now, and doing that you get used to certain luxuries. One of these is the packaging system that comes installed with various Linux distros – thousands of useful applications and libraries are just a sudo apt-get install or sudo yum install away, and the packaging system thoughtfully puts them in a place where your compiler can see them and it’s very easy to just install something from the command line, start up a text editor and away you go. But say you want to instead develop a project that works on both Linux and Windows… and suddenly you’re looking at things getting a lot more interesting.
Case in point: me. As I’ve recently got myself a machine that’s dual boot Windows and Linux, I came to the conclusion that I might as well target both in order to make life easier. A vision of being able to develop on both operating systems danced in my head, with me merrily typing away code in either Windows or Linux, it mattering not and then me happily commiting code to the git repository and then rebooting to see how it works on the other system. Such visions are fine… but they require more than a little work in order to become reality.
If you’re coding on Windows, odds are you’re going to be using some variant of Visual Studio to build your projects, and a very fine tool it is too – better than most IDEs you can get on Linux. The only problem with Visual Studio is that it requires a little work to configure SDL for you to be able to do things with it, but once it’s set up it shouldn’t be such a problem. Indeed, once you’ve done it you can set it so that you don’t need to go through the rigmarole of setting it up ever again… so here’s my guide to getting Visual Studio and SDL to play nice. I searched for this for a bit, but I didn’t find any explanations referring to Visual Studio 2013 and some of them seemed a bit bitty in my opinion. Just for reference, I’m using Visual Studio 2013, however having been a longtime user of the Visual Studio product series I can safely say it hasn’t changed that much over the years.
So, we start by getting a hold of the SDL2 development libraries from libsdl.org. You should choose the Visual Studio version listed:
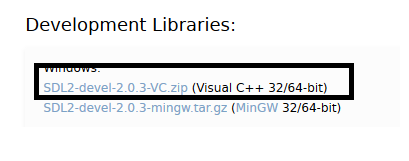
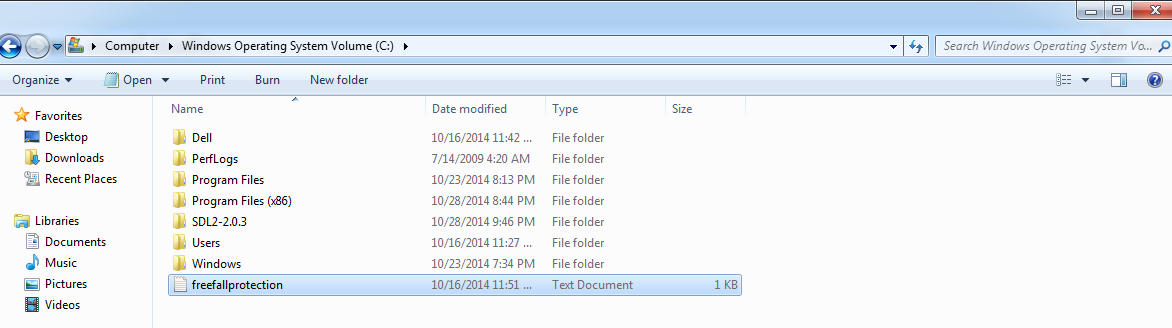
I’ve highlighted the SDL2 Visual Studio version. Download it, then extract it and stick it somewhere convenient for you. Personally, I’ve always thought that in the root of the C drive is a good idea, simply to avoid navigating through long chains of directories.
Good. So we’ve got this sorted. Now of course, comes the fun part of setting Visual Studio itself up to work with SDL2.
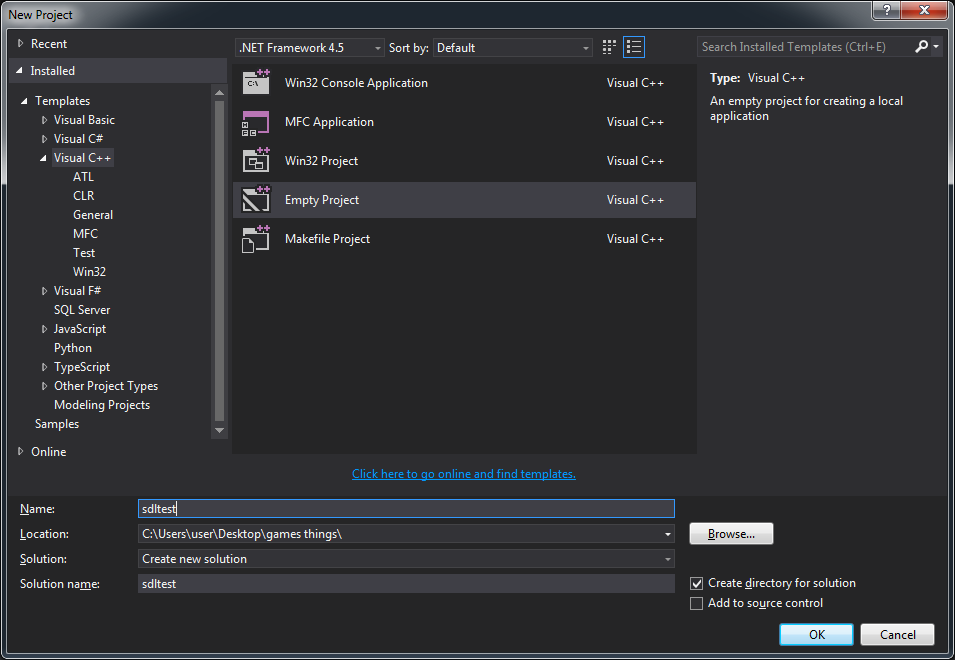
First, create an empty project, calling it whatever you want (I’ve called mine sdltest)
After you’ve done this, add a C++ source file to the project, then go to View > Property Pages to bring up the project’s properties. You should see the Property Pages window. First things first, make sure to select All Configurations in the Configuration field so this applies to both debug and release builds, otherwise Visual Studio will complain and state that it can’t find the header files if you’re using a configuration you’ve not set the directories up for (as happened to me).

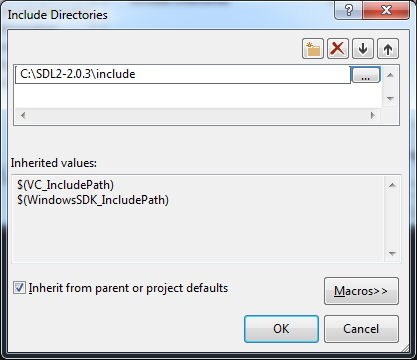
Go to Configuration Properties > VC++ Directories first, and click in Include Directories then select Edit from the drop-down list. You should be able to navigate to the location of the include directory and select it:
It’s a similar process for the Library Directories, too. I found that using the x86 libraries seemed to work best, as compiling my test program with the x64 binaries lead to an explosion of unreferenced symbol errors…
Next, go to Linker > Input and click in the Additional Dependencies field.
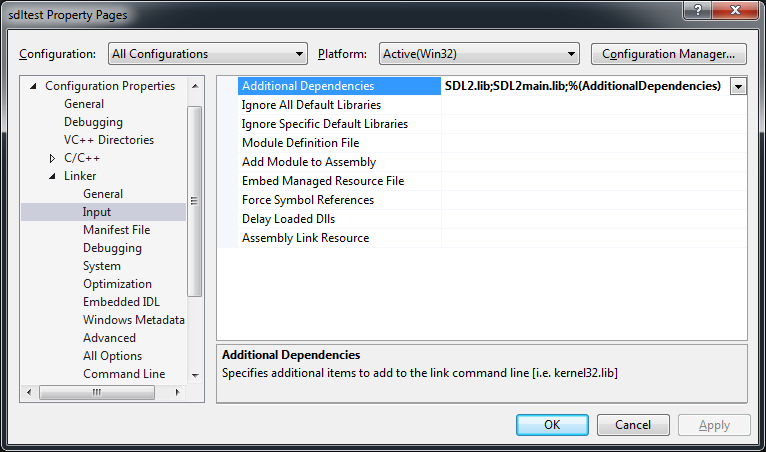
Again, there’s a drop down list with an Edit option.

Fill in SDL2.lib and SDL2main.lib in here. Almost done… next go to System which is still under the Linker heading….
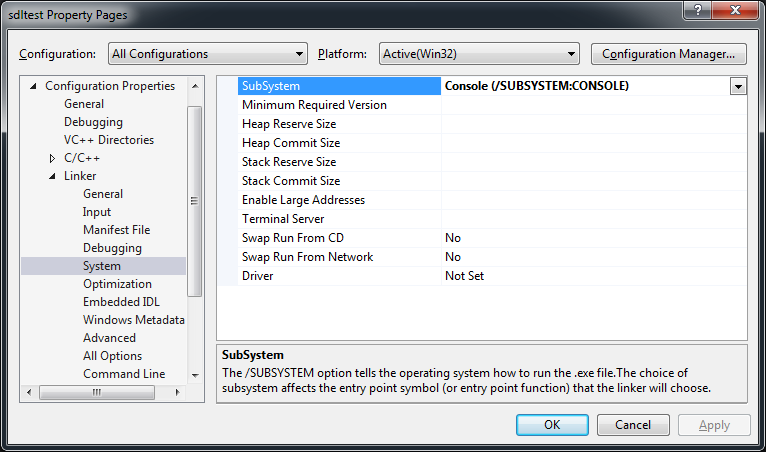
Select Console(/SUBSYSTEM:CONSOLE) from under the SubSystem heading. This is to ensure that it shows a console you can print debug messages to as unlike Linux, you may not necessarily be launching these things from the terminal. All of this is now set up, so now we write a test program to see if it installed successfully:
#include

#include "SDL.h"
int main(int argc, char **argv) {

if (SDL_Init(SDL_INIT_EVERYTHING) != 0) {

std::cout << "SDL_Init Error: " << SDL_GetError() << "\n";

return 1;

}
std::cout << "SDL has initialized successfully\n";

SDL_Quit();

getchar();

return 0;

}
If everything above went without a hitch, this should compile successfully. Place the SDL2.dll DLL in the directory with the executable (otherwise it states it can’t find the SDL2 DLL), and run it. All going well, you should see:

which is, after a lot of thrashing around, a relief. But we really, really don’t want to do this again, so go to File > Export Template and then select Project Template from the wizard that’s shown. Follow the wizard through, and Visual Studio should save a project template with the correct project configuration options for next time:

So, you can now just create a new SDL project in future without having to go through all this nonsense every… single… time like I did a few years back. Happy developing!
